Attention
Share
IDE to SATA bi-directional transfer card conversion card new and old optical drive hard disk serial port to parallel port mutual transfer expansion card
Price GH¢ 99.06
Coupons
More>
Comprehensive Score
5
cumulative comments 0Goods Guarantee 100% authenticity guarantee
Delivery address China
Ship to
Color
Quantity
TospinoMall Commitment
TospinoMall guarantees the security of your transaction: we will only allocate funds to the seller after the buyer confirms the receipt of the goods!
Special recommendation
Professional 3C store
Enter Store
Favorite Stores
Hot Picks of the Store
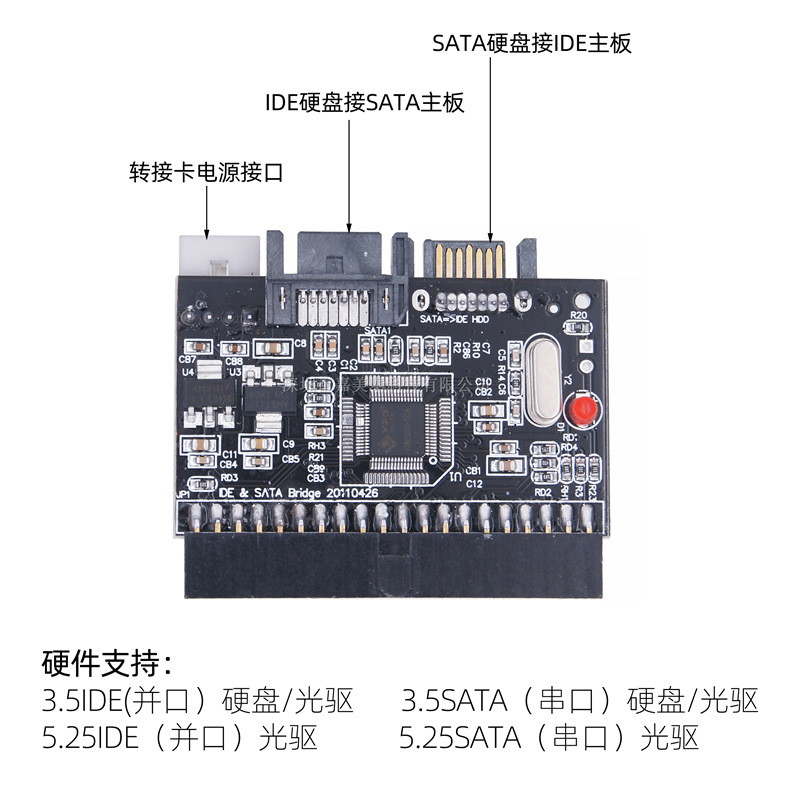
名称:sata转ide双向转接卡
主控IC:JM20330
配件:互转卡x1,7PIN sata数据线x1,ide电源线x1
(因产品批次不同配件颜色或外观可能会与链接图和前面的批次有细微差异,不会影响使用,介意勿拍)
系统支持:Windows
注意:需要在断电状态下进行安装,不支持热插拔
sata转ide
1.操作之前先把电脑关机
2.打开电脑机箱,将转接卡插到主板的ide接口上
3.将所配的sata数据线一端连接在转接卡的sata接口上,另一端连接在硬盘sata接口上,
4.按照转接卡标签指示设置好开关和跳线
5.将所配的转接卡电源线接上(注意方向不能接反)。同时插好sata硬盘的电源线
接好后电脑开机,电脑能正确识别出所接的sata设备即可正常使用
ide转sata
1.操作之前先把电脑关机
2.打开电脑机箱,将所配的sata数据线一端插到主板上的sata接口,另一端连接在转接卡的sata接口上
3.跳线在光驱边上欧说明需要设置成主板即:Master
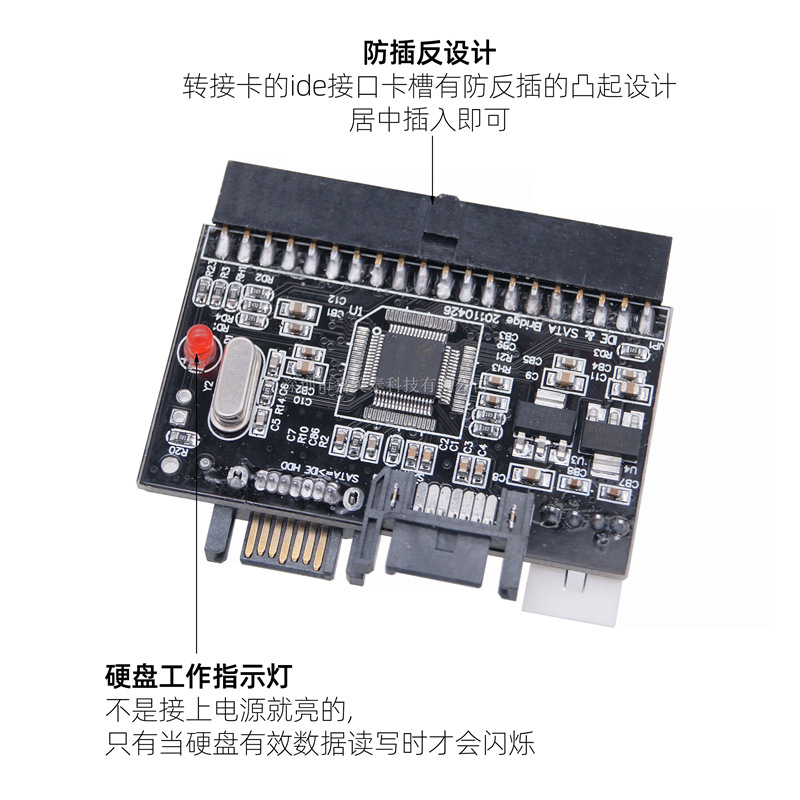
4.将你的ide硬盘插在转接卡的ide接口(注意卡的正面和反面方向,避免插错),转接卡的ide接口接口有防反插的凸起设计
居中插入即可。同时你的ide硬盘需要跳为主盘
5.将所配的转接卡电源线接上(注意方向不能接反)同时插好ide硬盘的电源线
接好后电脑开机进入系统检测,电脑主机正确识别出所接的ide硬盘,开启正常使用
注意事项!!
1.ide硬盘转接sata主板时,需要把硬盘的跳线设置成主盘
2.转接卡需要外接电源才能正常使用
3.在连接转接卡时需要关闭电脑